Mobile Email Preference
Microsoft 365 email typically works best with the Outlook App, but some users prefer to use their native iPhone or Android email application. This article provides instructions for all 3:
iPhone Default Mail App
Open the Settings app on your iPhone.
Scroll down and tap Mail, then tap Accounts.
Tap Add Account, and select Microsoft Exchange (or Outlook.com, though Exchange is standard for business/school M365 accounts).
Enter your full Microsoft 365 email address and a description (e.g., "Work"), then tap Next.
Tap Sign In to prompt the Microsoft sign-in page.
Enter your password and complete any multi-factor authentication (MFA) prompts required by your organization (such as an authenticator app code or SMS).
Tap Consent or Accept if prompted to allow permissions for the app.
Choose which information you want to sync with your phone (Mail, Contacts, Calendars, Reminders, Notes) and tap Save.
Android Default Email App
Note: We strongly recommend using the Outlook App on Android. However, the steps are outlined below to add your Microsoft Account to the native Android App. Steps may vary slightly depending on your specific Android manufacturer (Samsung, Google Pixel, etc.), but the general flow remains the same.
Open your device's Settings and look for Accounts or Passwords & Accounts, then tap Add Account.
Select Microsoft Exchange (sometimes listed as Exchange ActiveSync or Corporate).
Type in your full Microsoft 365 email address and tap Next.
Enter your password when prompted and tap Sign In.
Complete your organization's multi-factor authentication (MFA) verification if requested.
Tap Allow or Grant Access to give the app permission to sync your email, contacts, and calendar.
Name your account if prompted and tap Done or Next to finish setup.
Microsoft Outlook App (iOS & Android)
The Microsoft Outlook app can be downloaded from the Apple App Store or Google Play Store (if needed)
Open the Outlook app. On first use, enter your work or school Microsoft 365 email address.
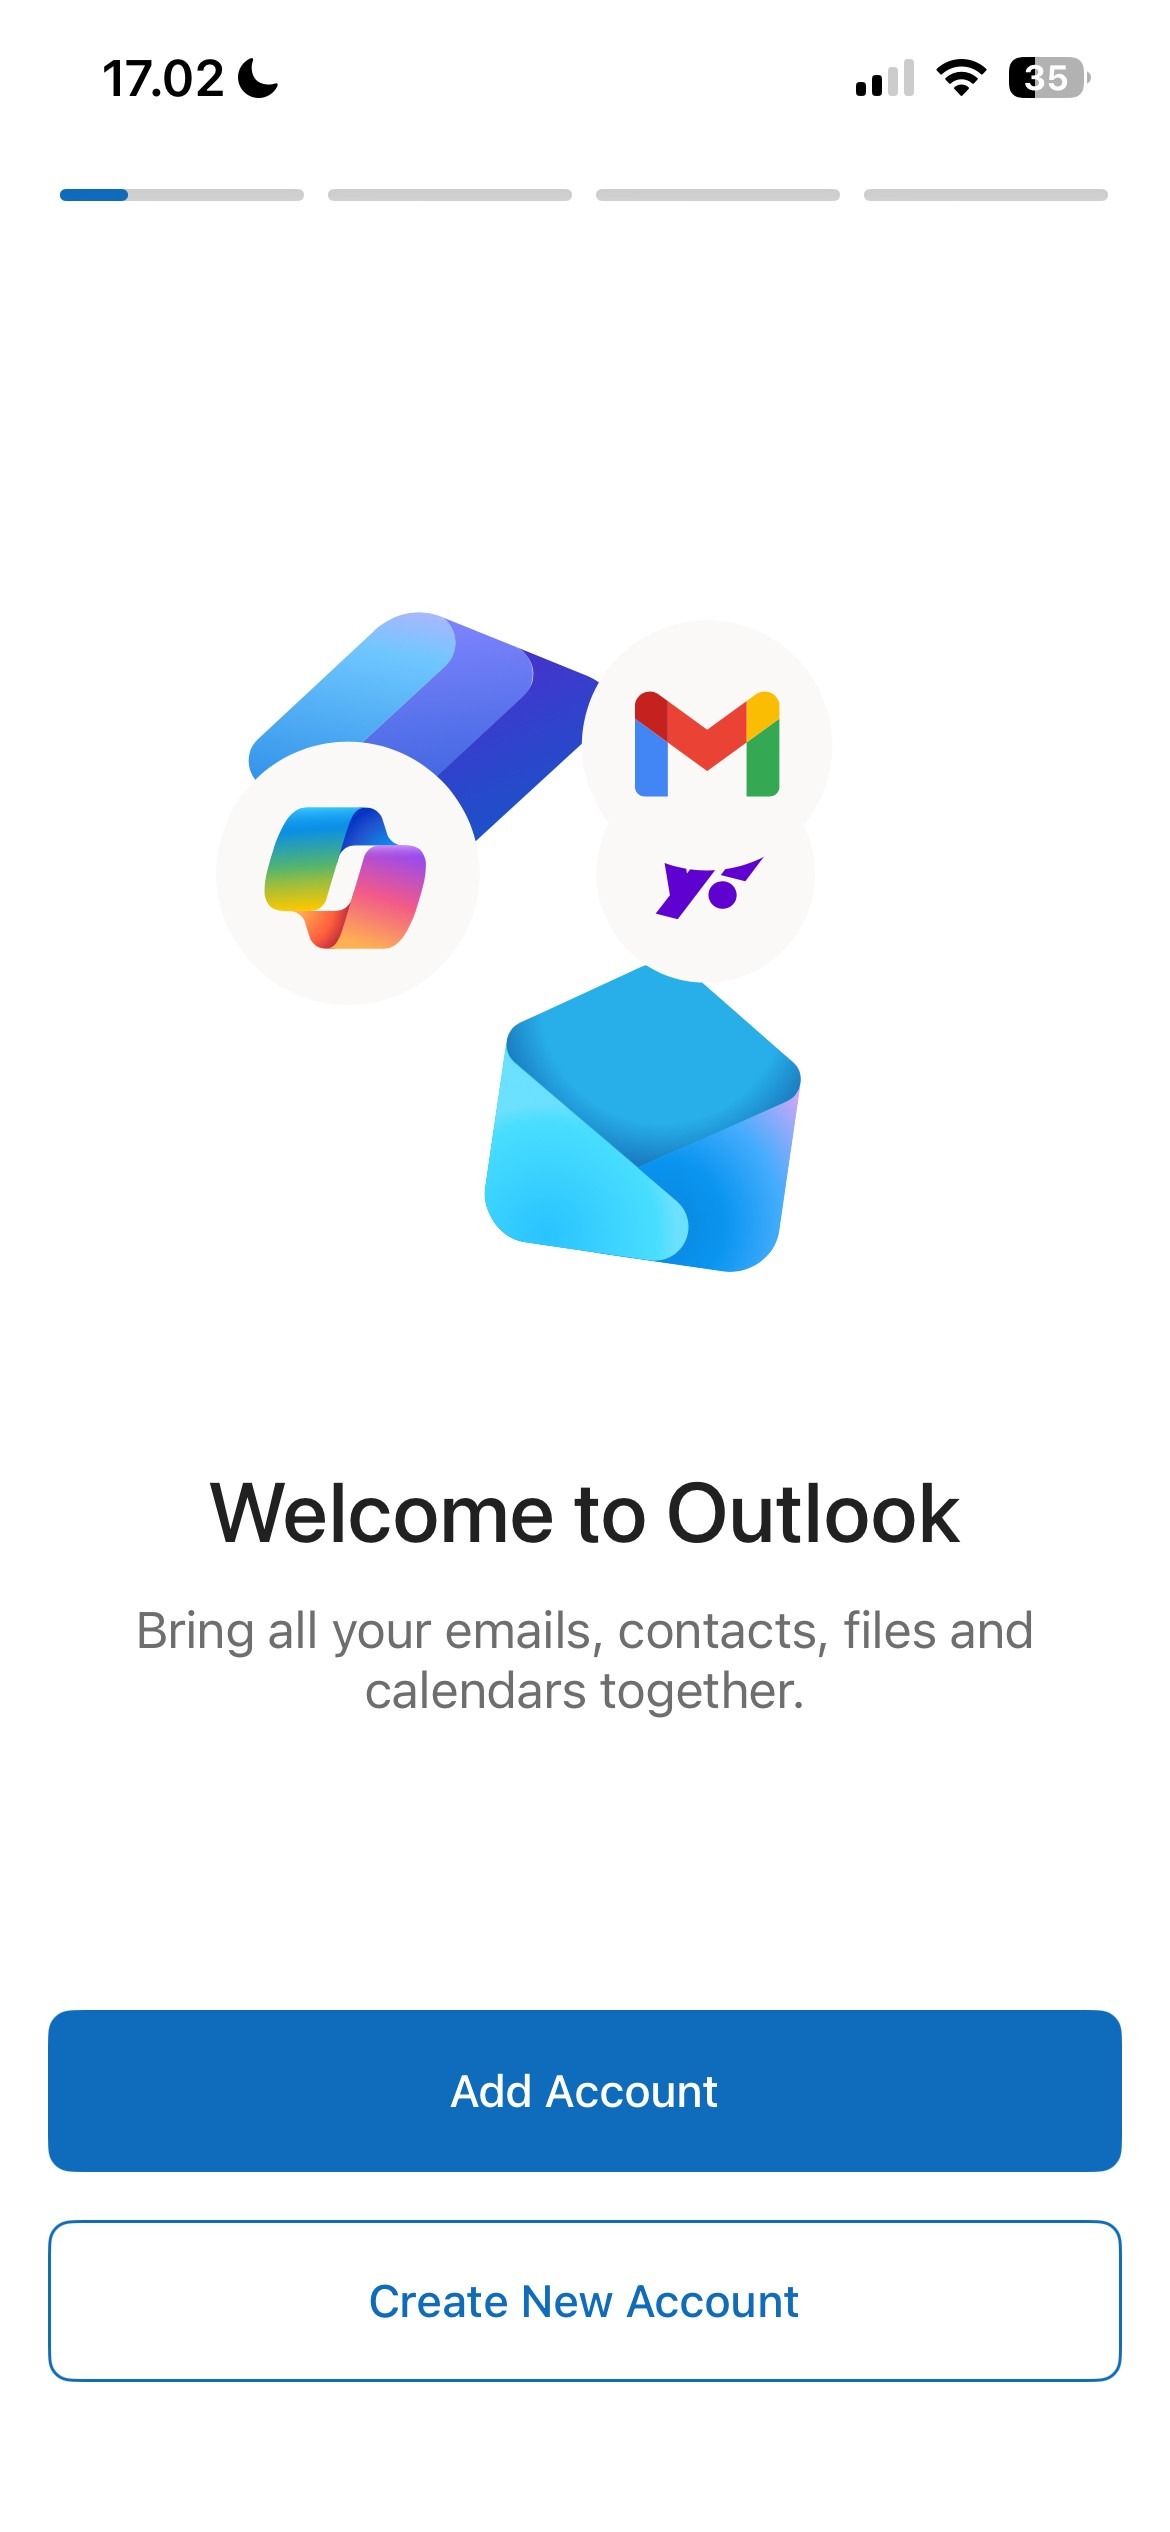
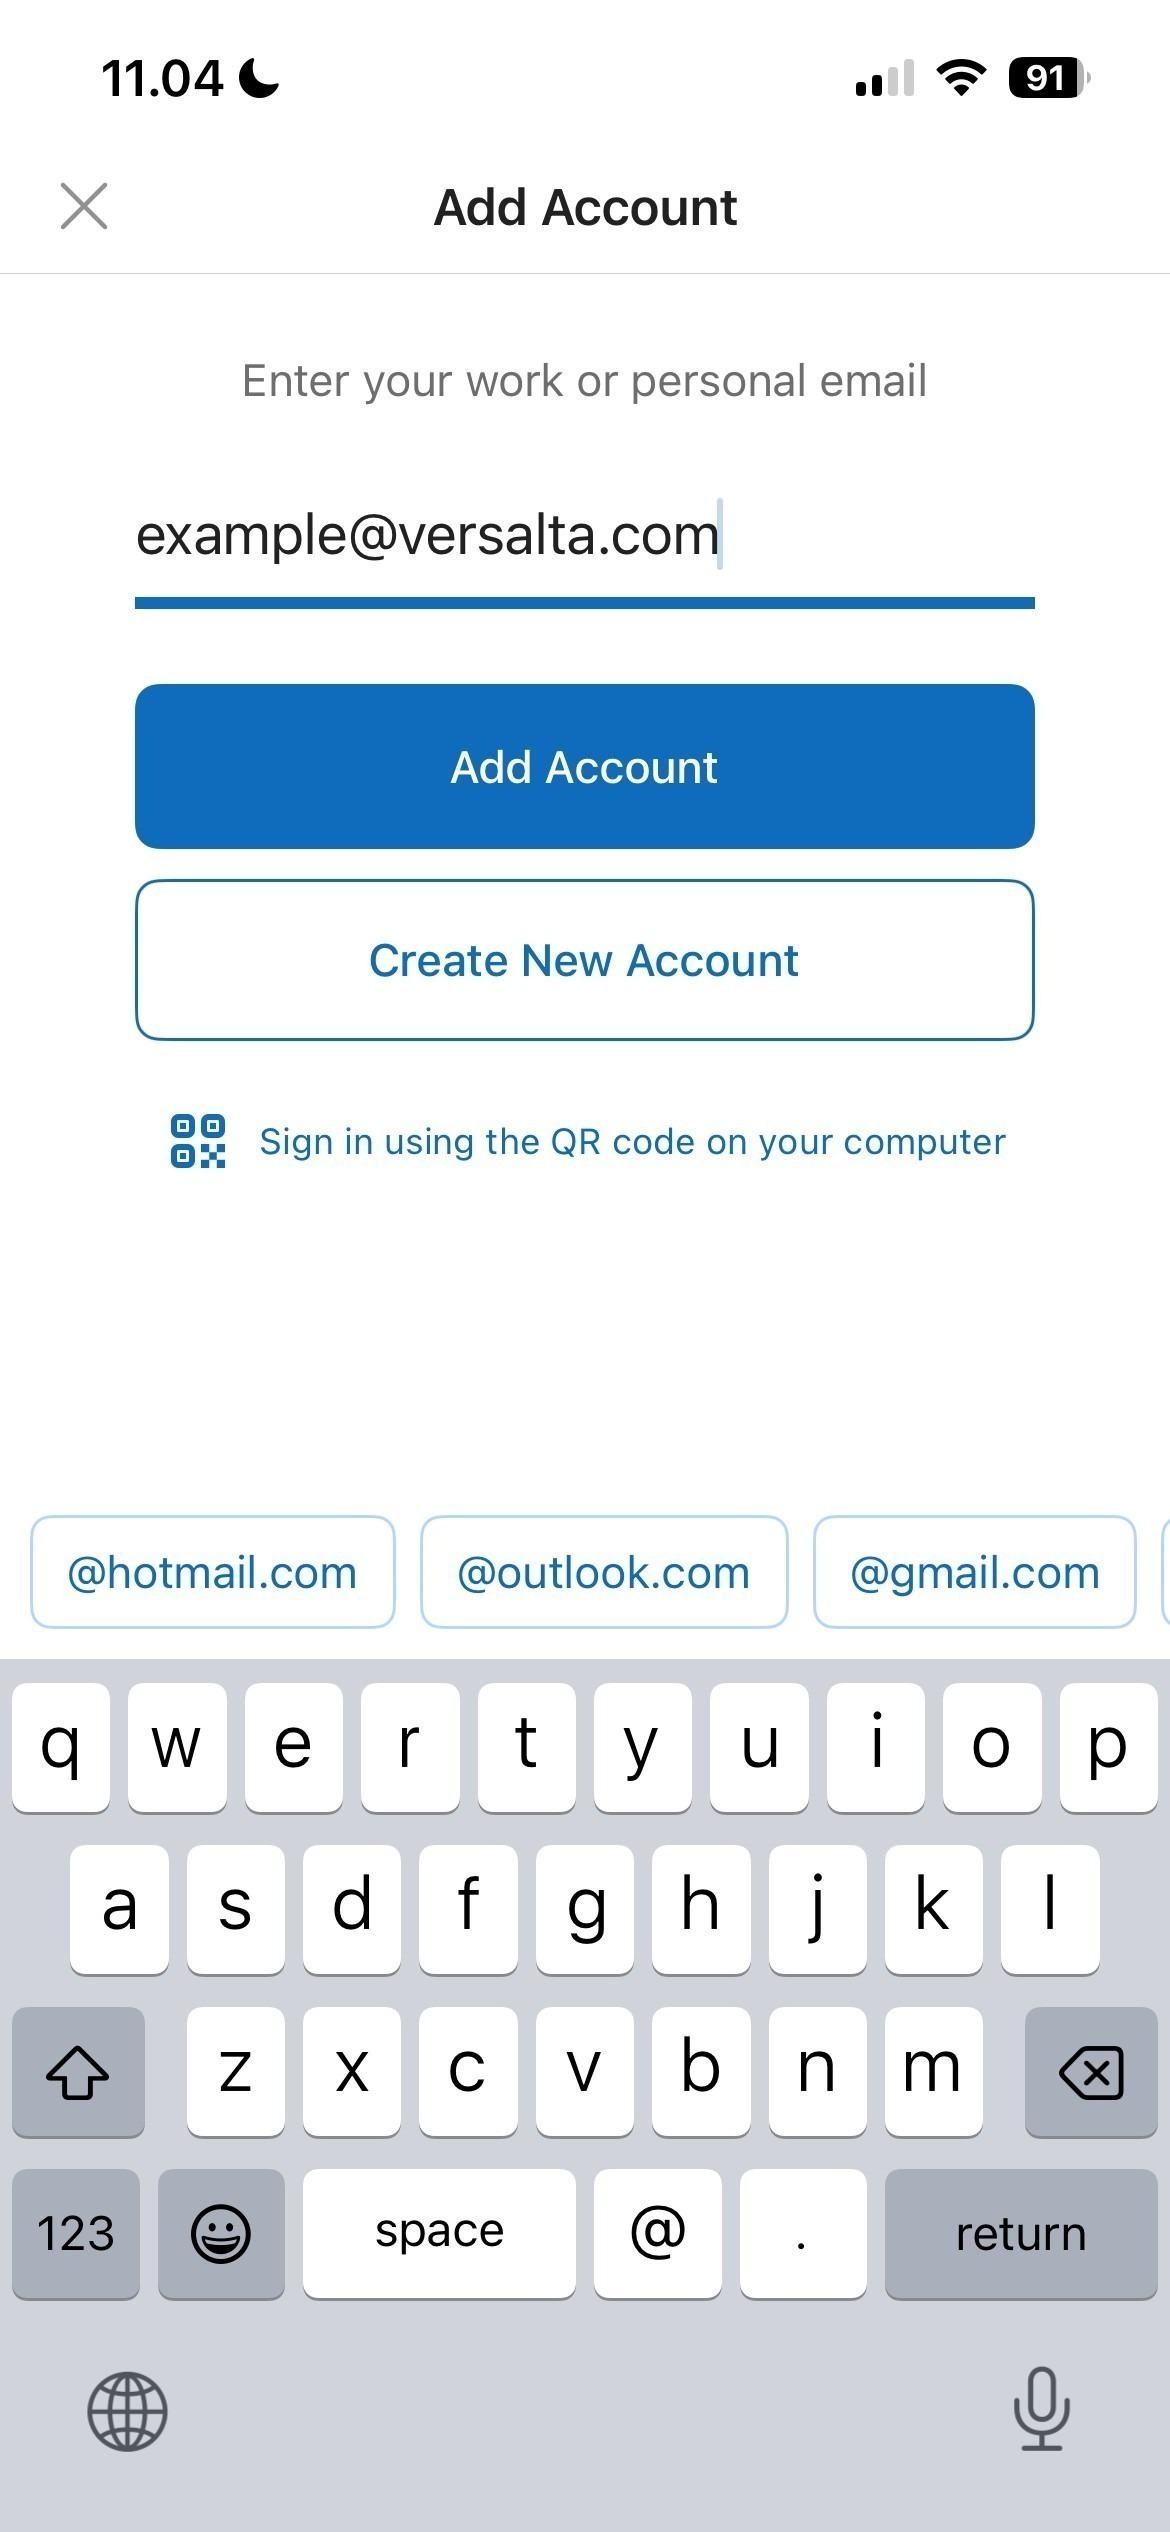
If you already have an account logged in, tap your profile icon in the top-left corner, tap the Gear/Settings icon at the bottom, and select Add Account > Add Email Account.
Tap Continue (or Add Account).
The app will automatically redirect you to your organization's secure sign-in portal. Enter your password.
Complete any multi-factor authentication (MFA) steps required by your IT administrator.
If prompted to add another account, tap Maybe Later or add any secondary accounts you need.
On the next screen, enter the temporary password given by the support team. You will be required to change this password after the first log in. You may then be prompted to set up Microsoft multi-factor authentication, in which case you can find assistance here: How do I Set Up M365 Multi-Factor Authentication?
If you already have a Microsoft Email established in Outlook on your mobile device
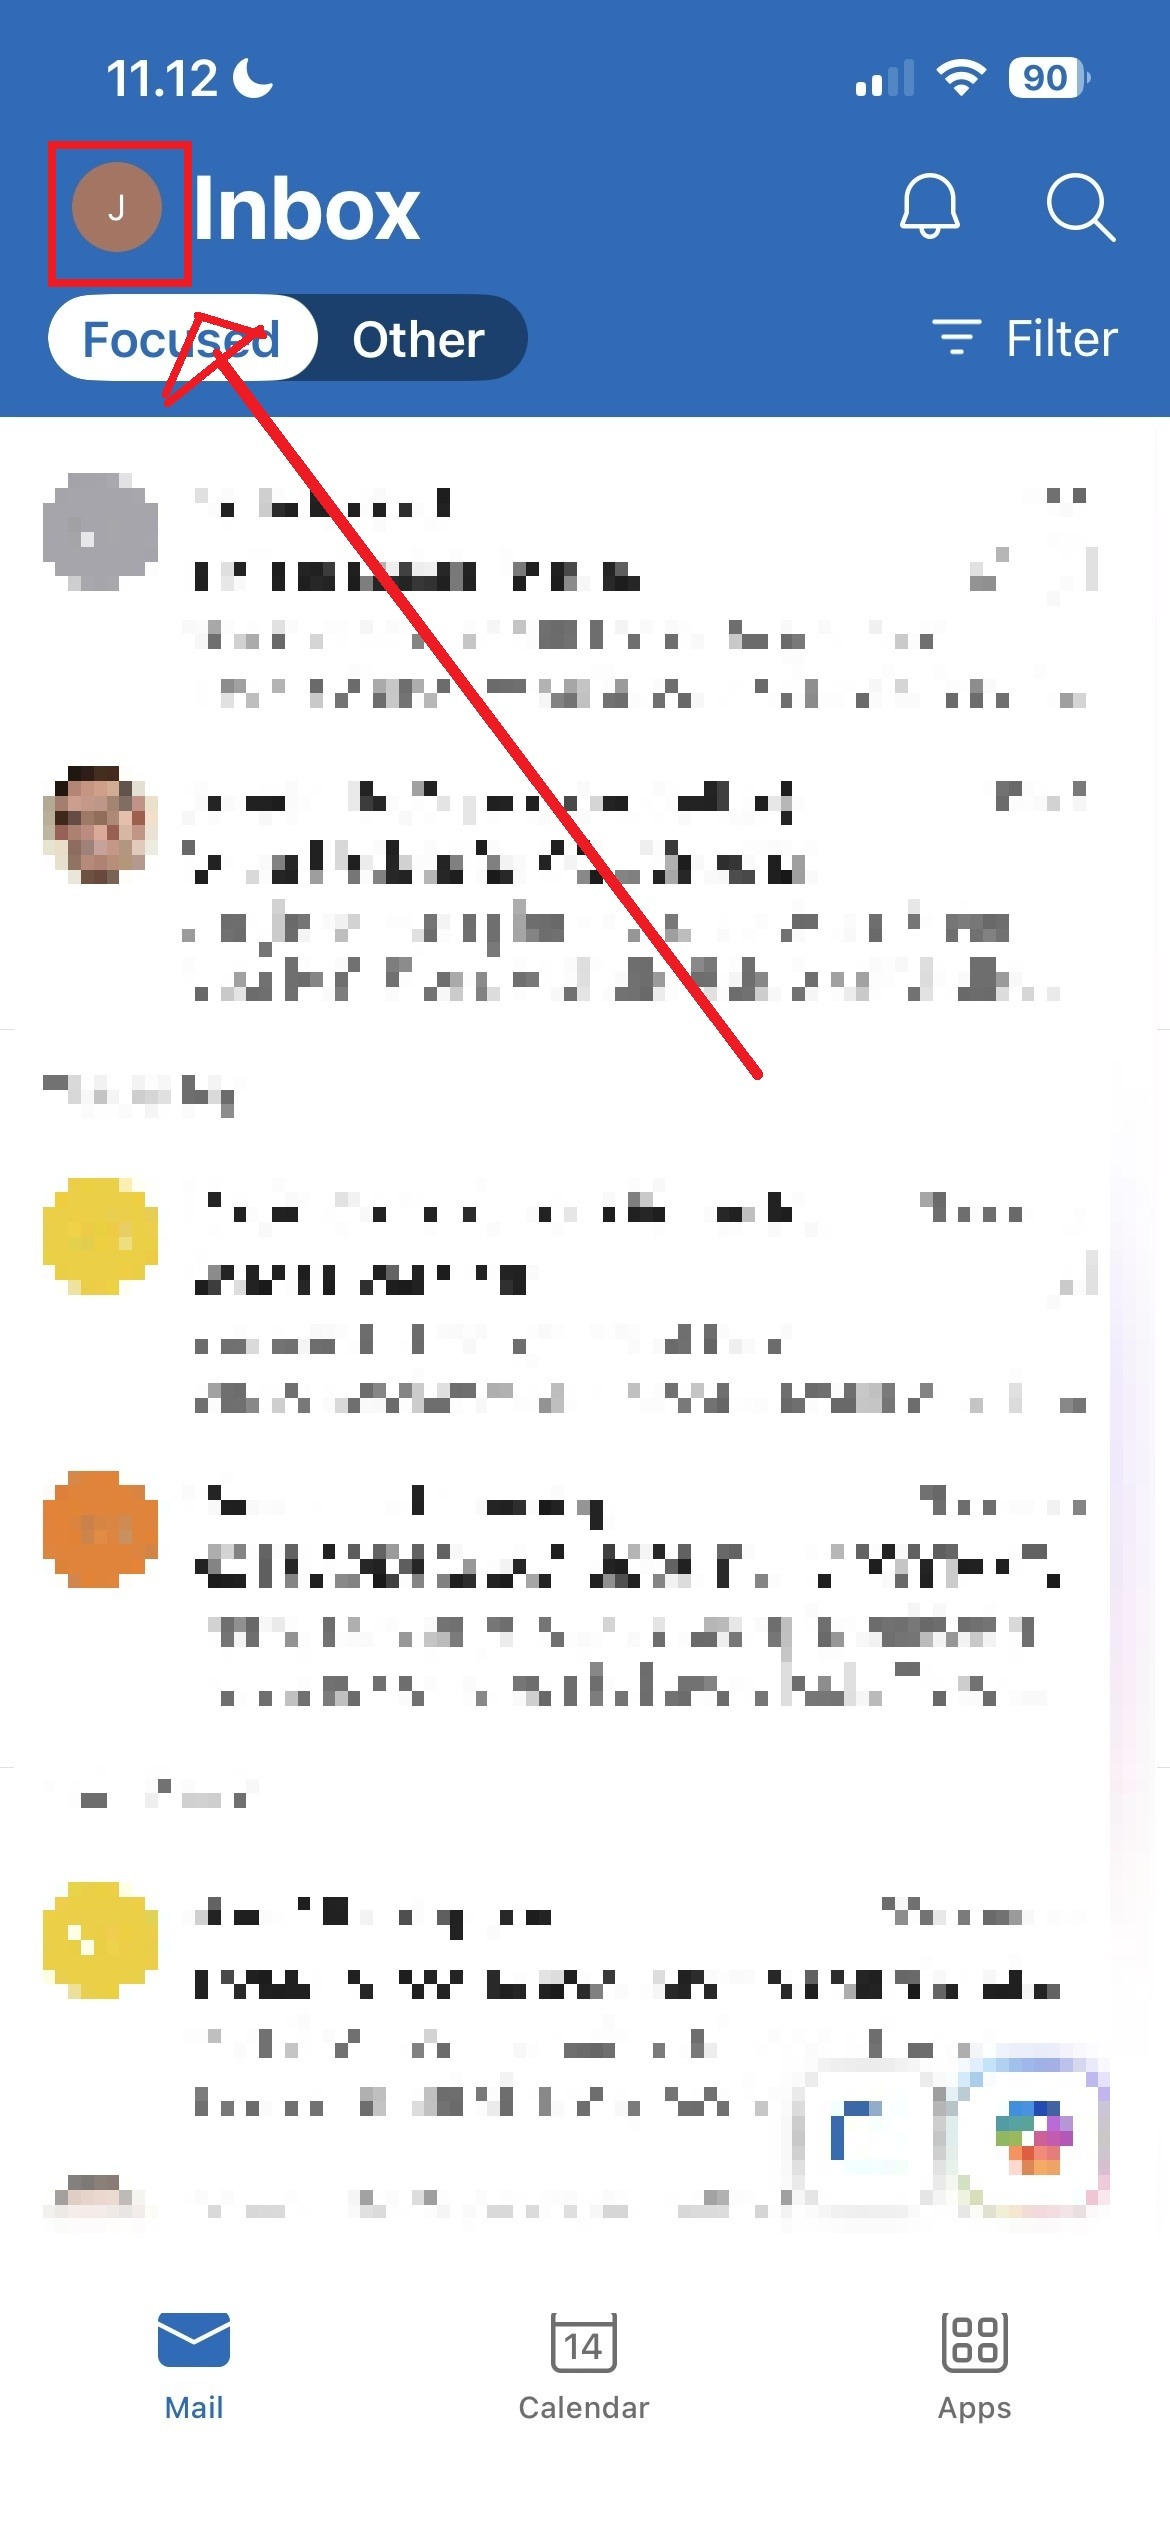
Open Microsoft Outlook on your mobile device
and tap on your profile picture in the top left.
Hit the settings (gear) icon in the bottom left and scroll down until you reach the Accounts tab.
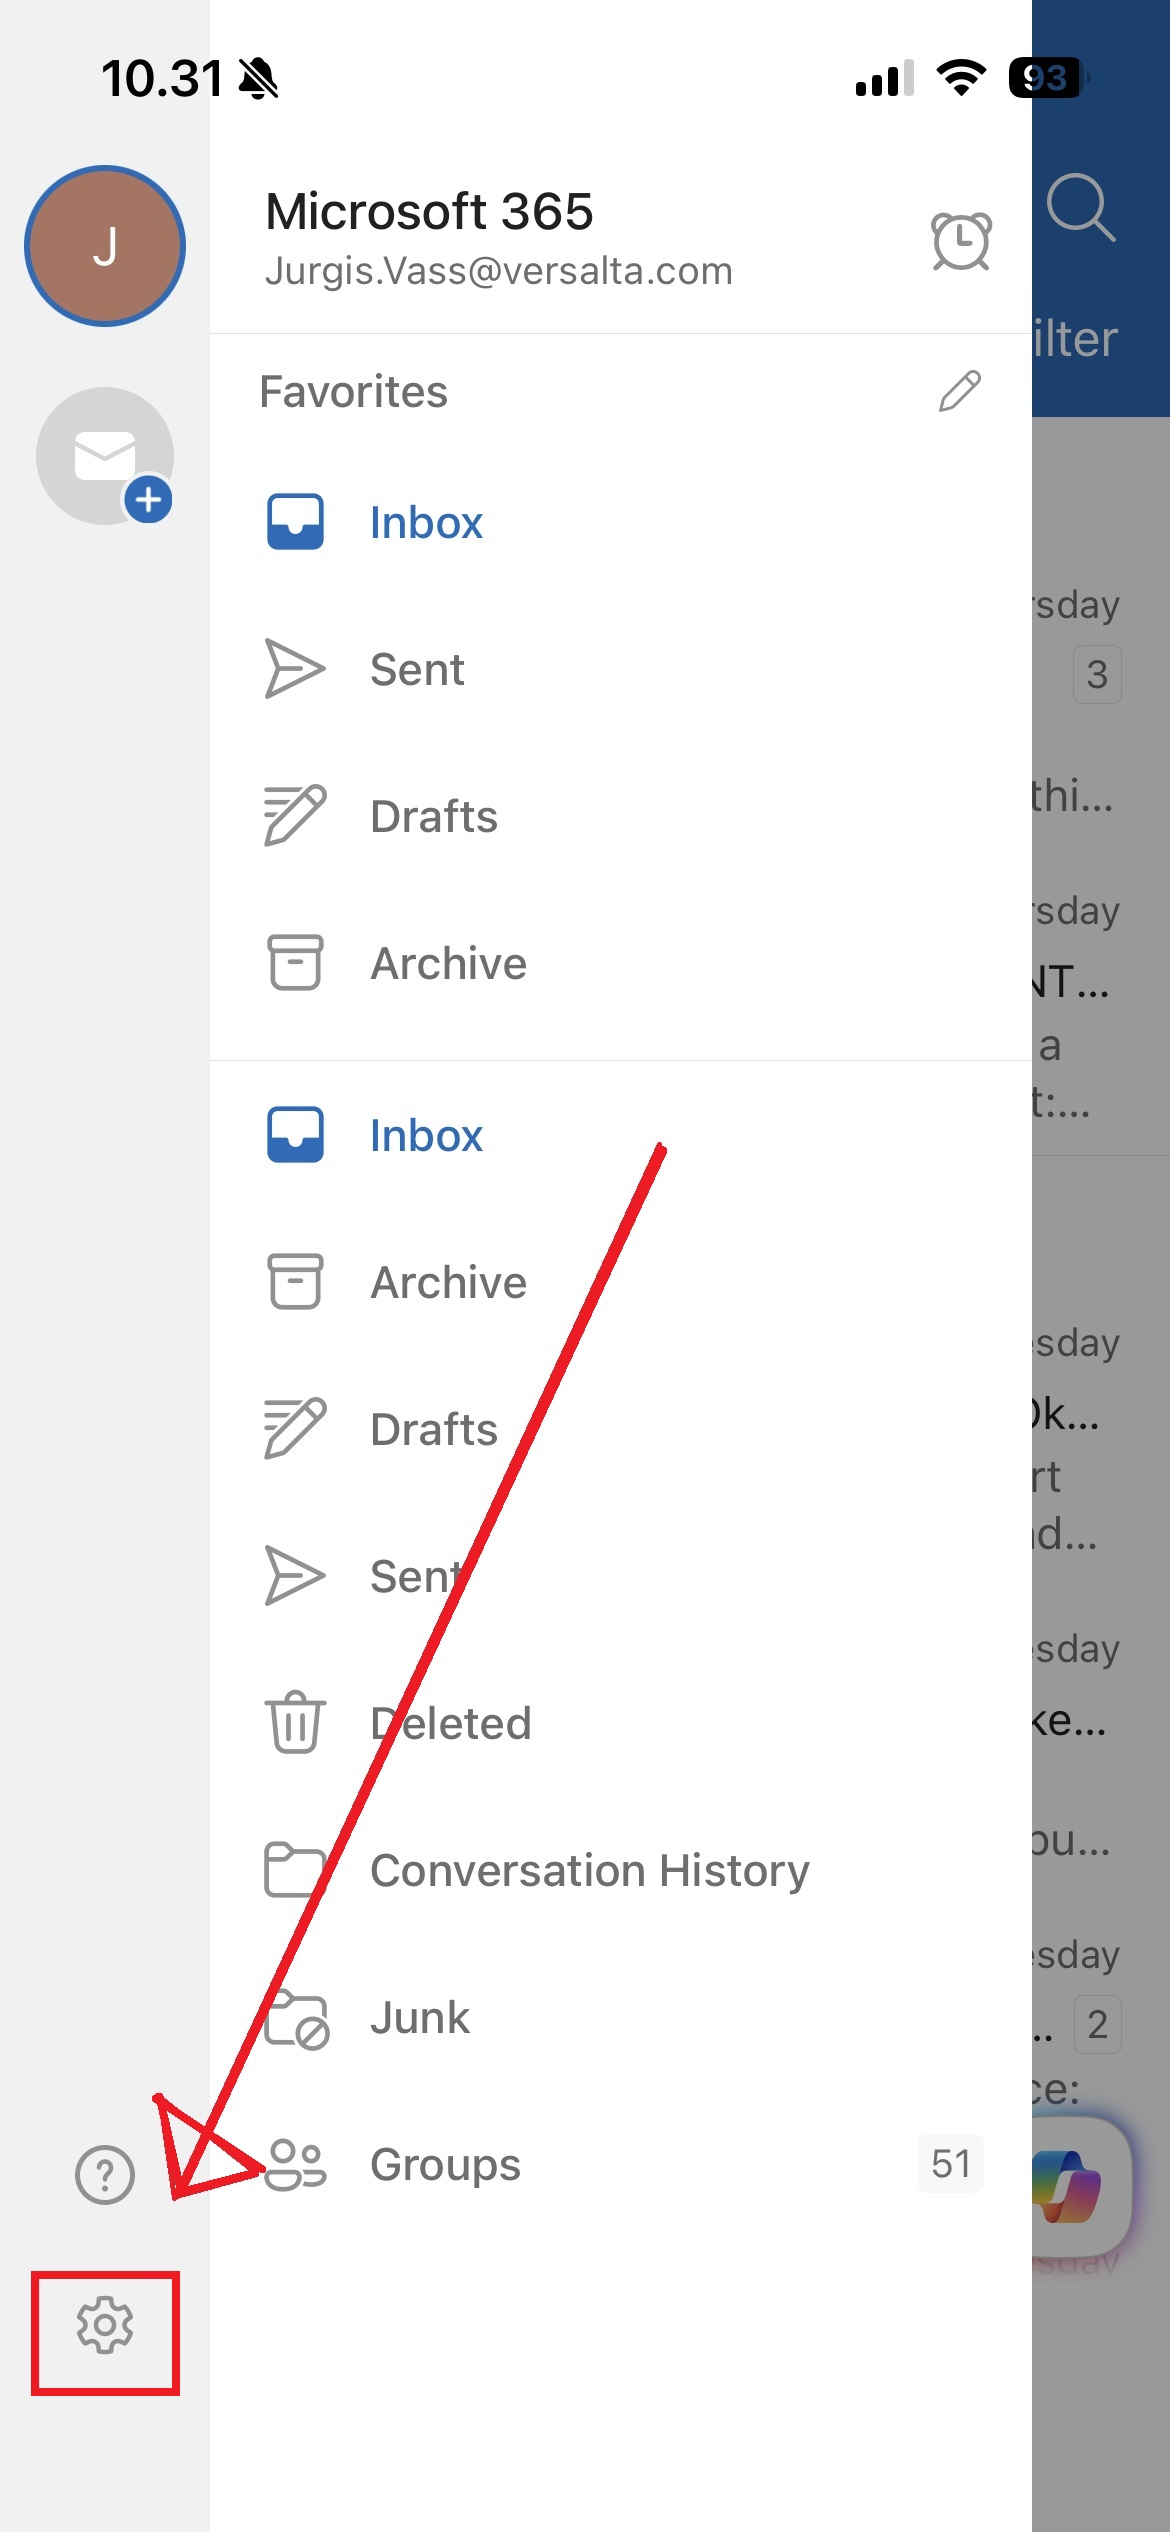
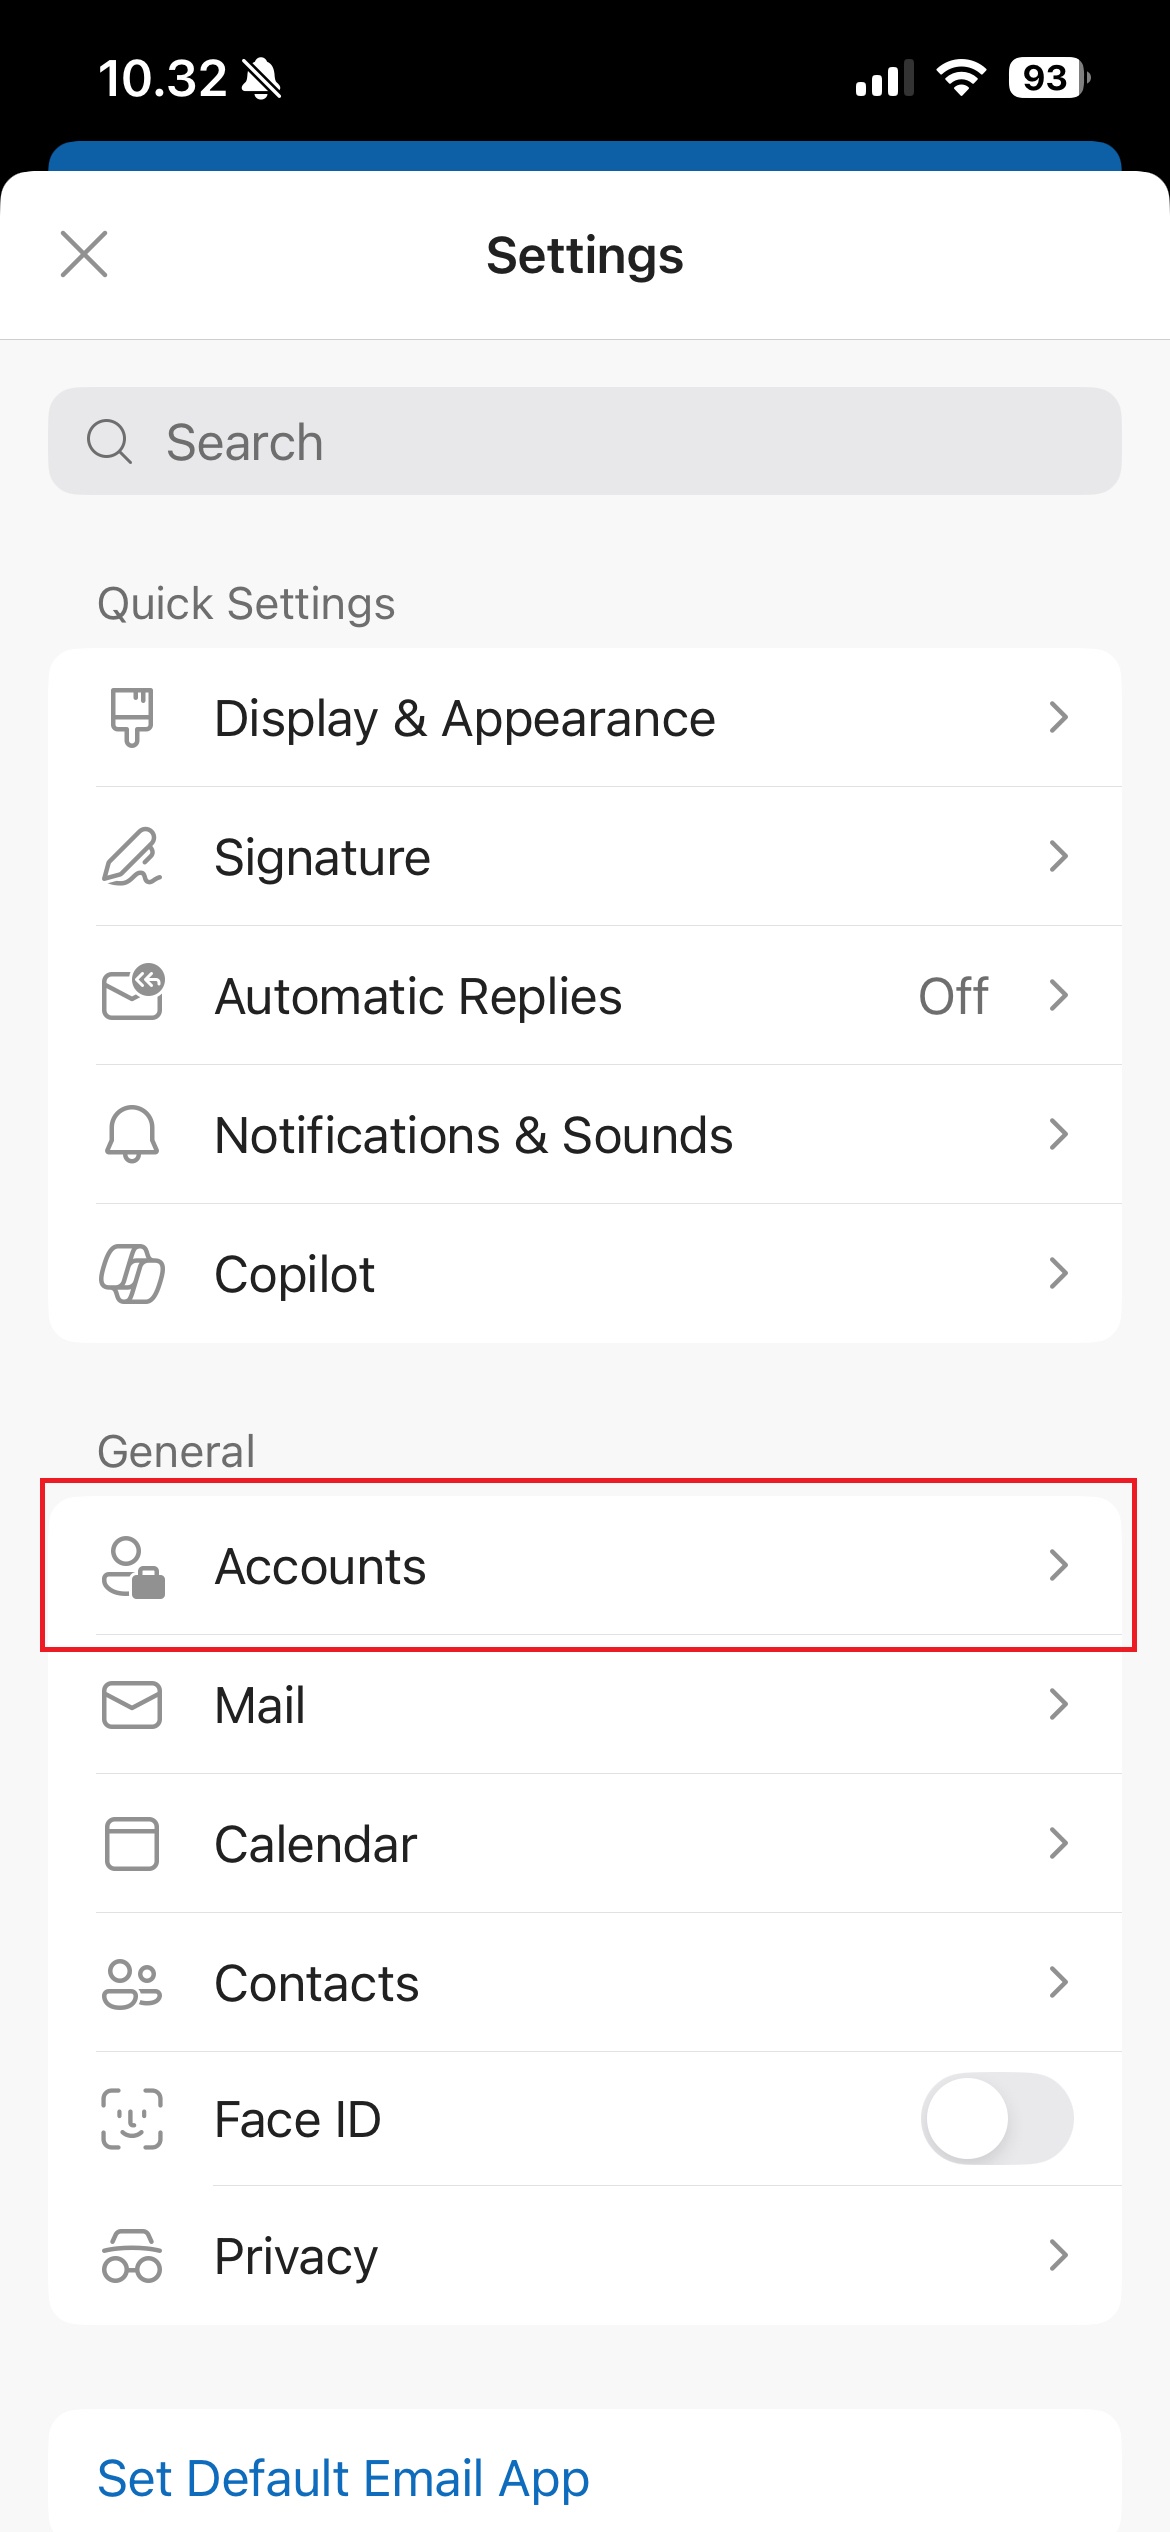
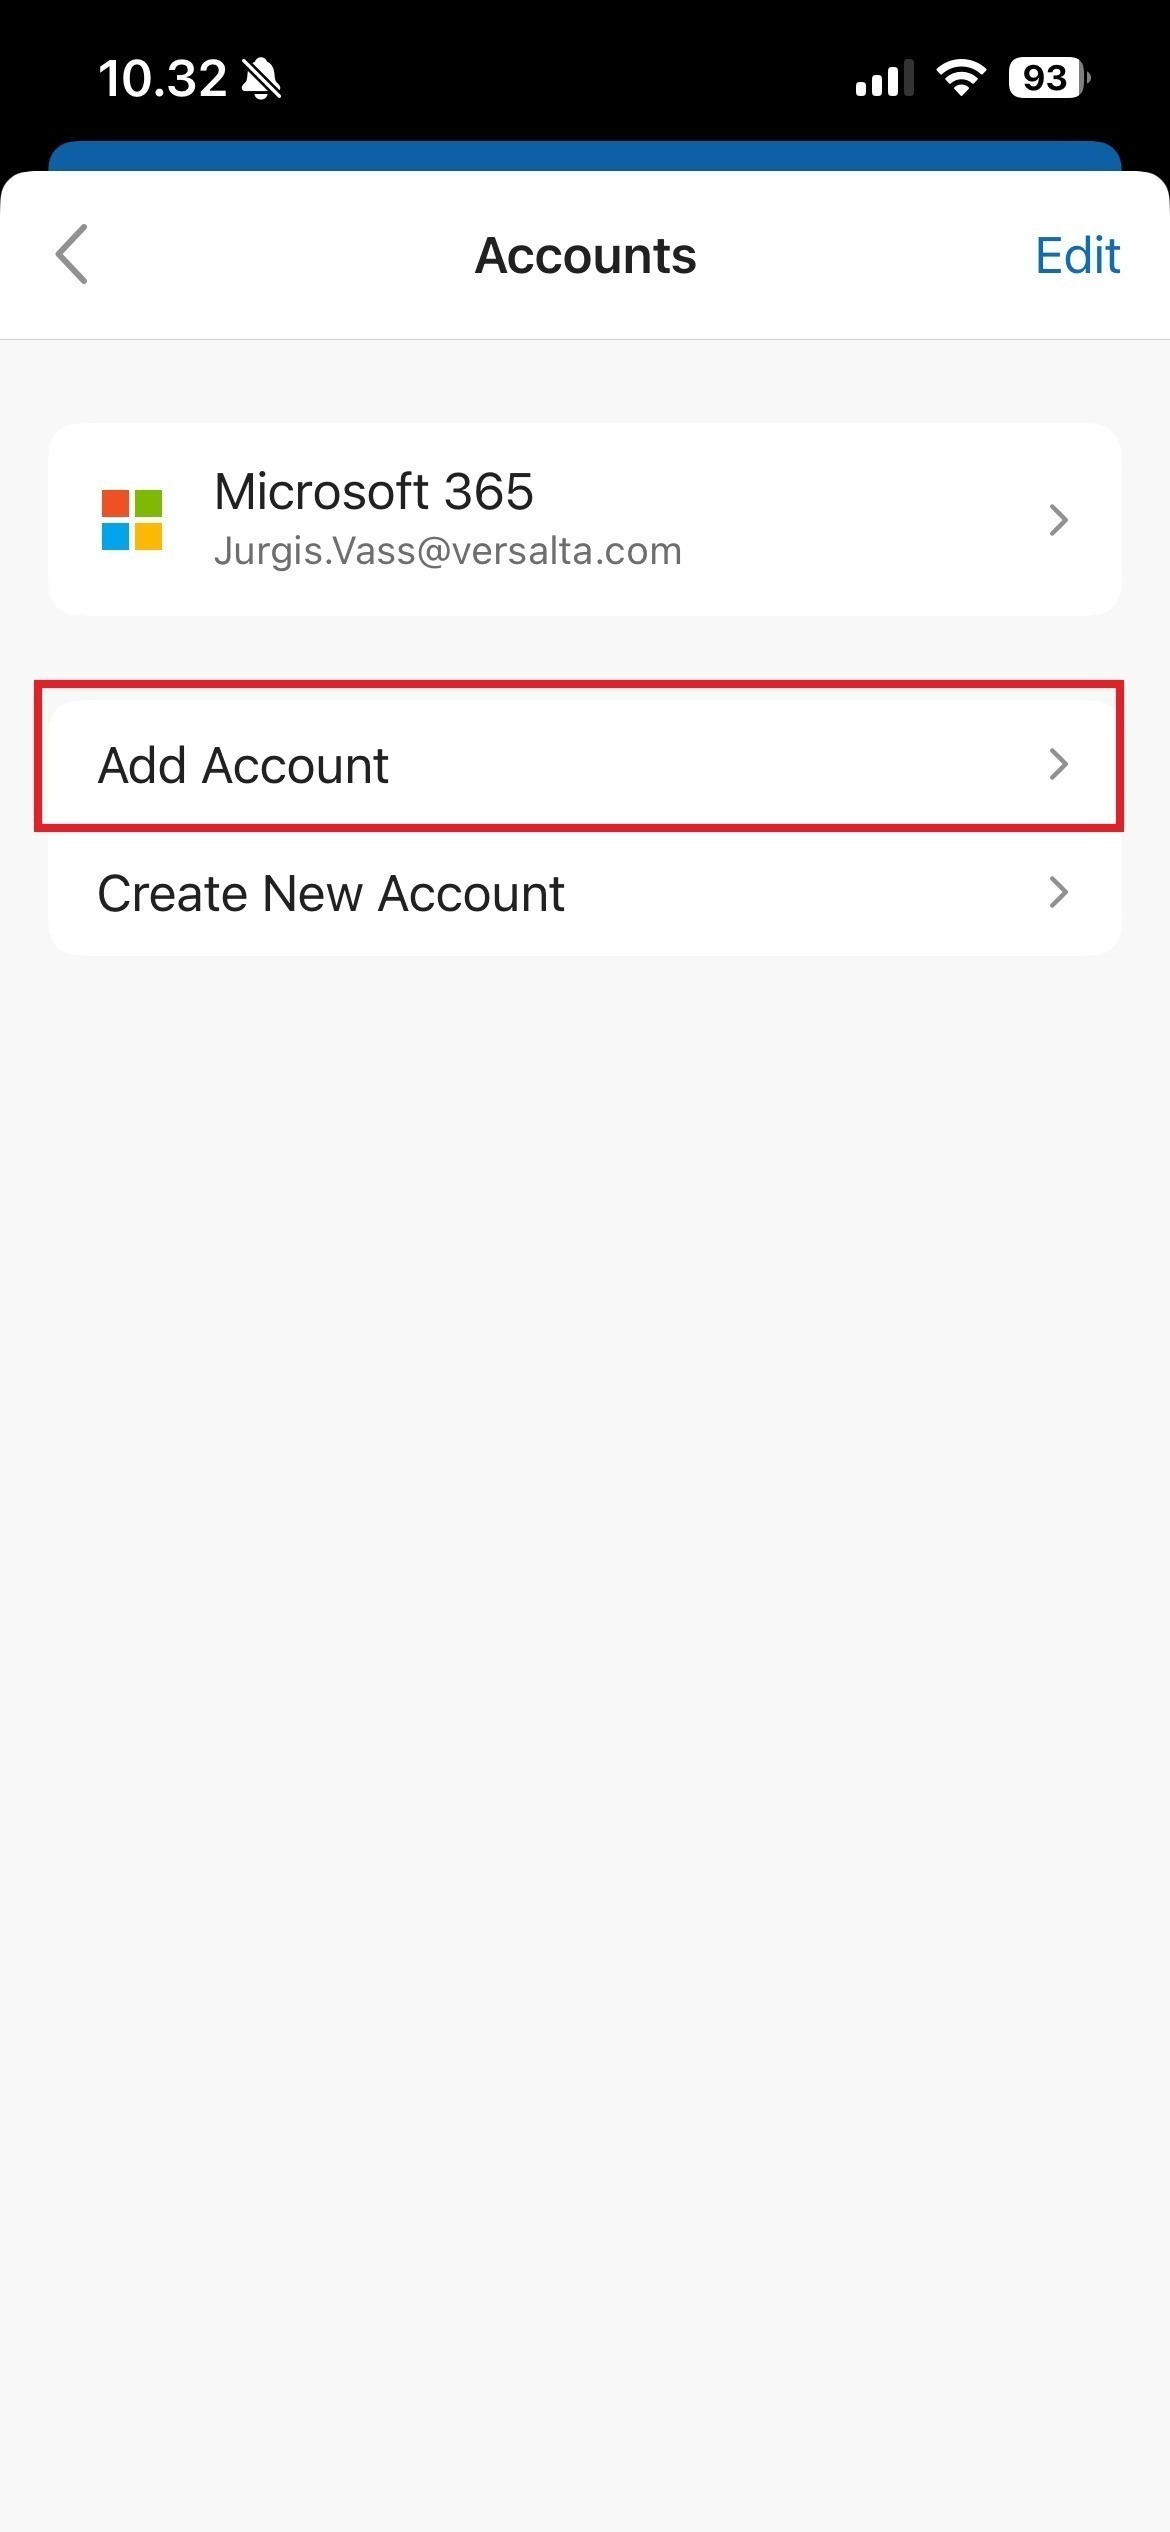
Tap on it, press Add Account, and then press Email Account. Enter the email address given by your IT support team, then enter the temporary password.
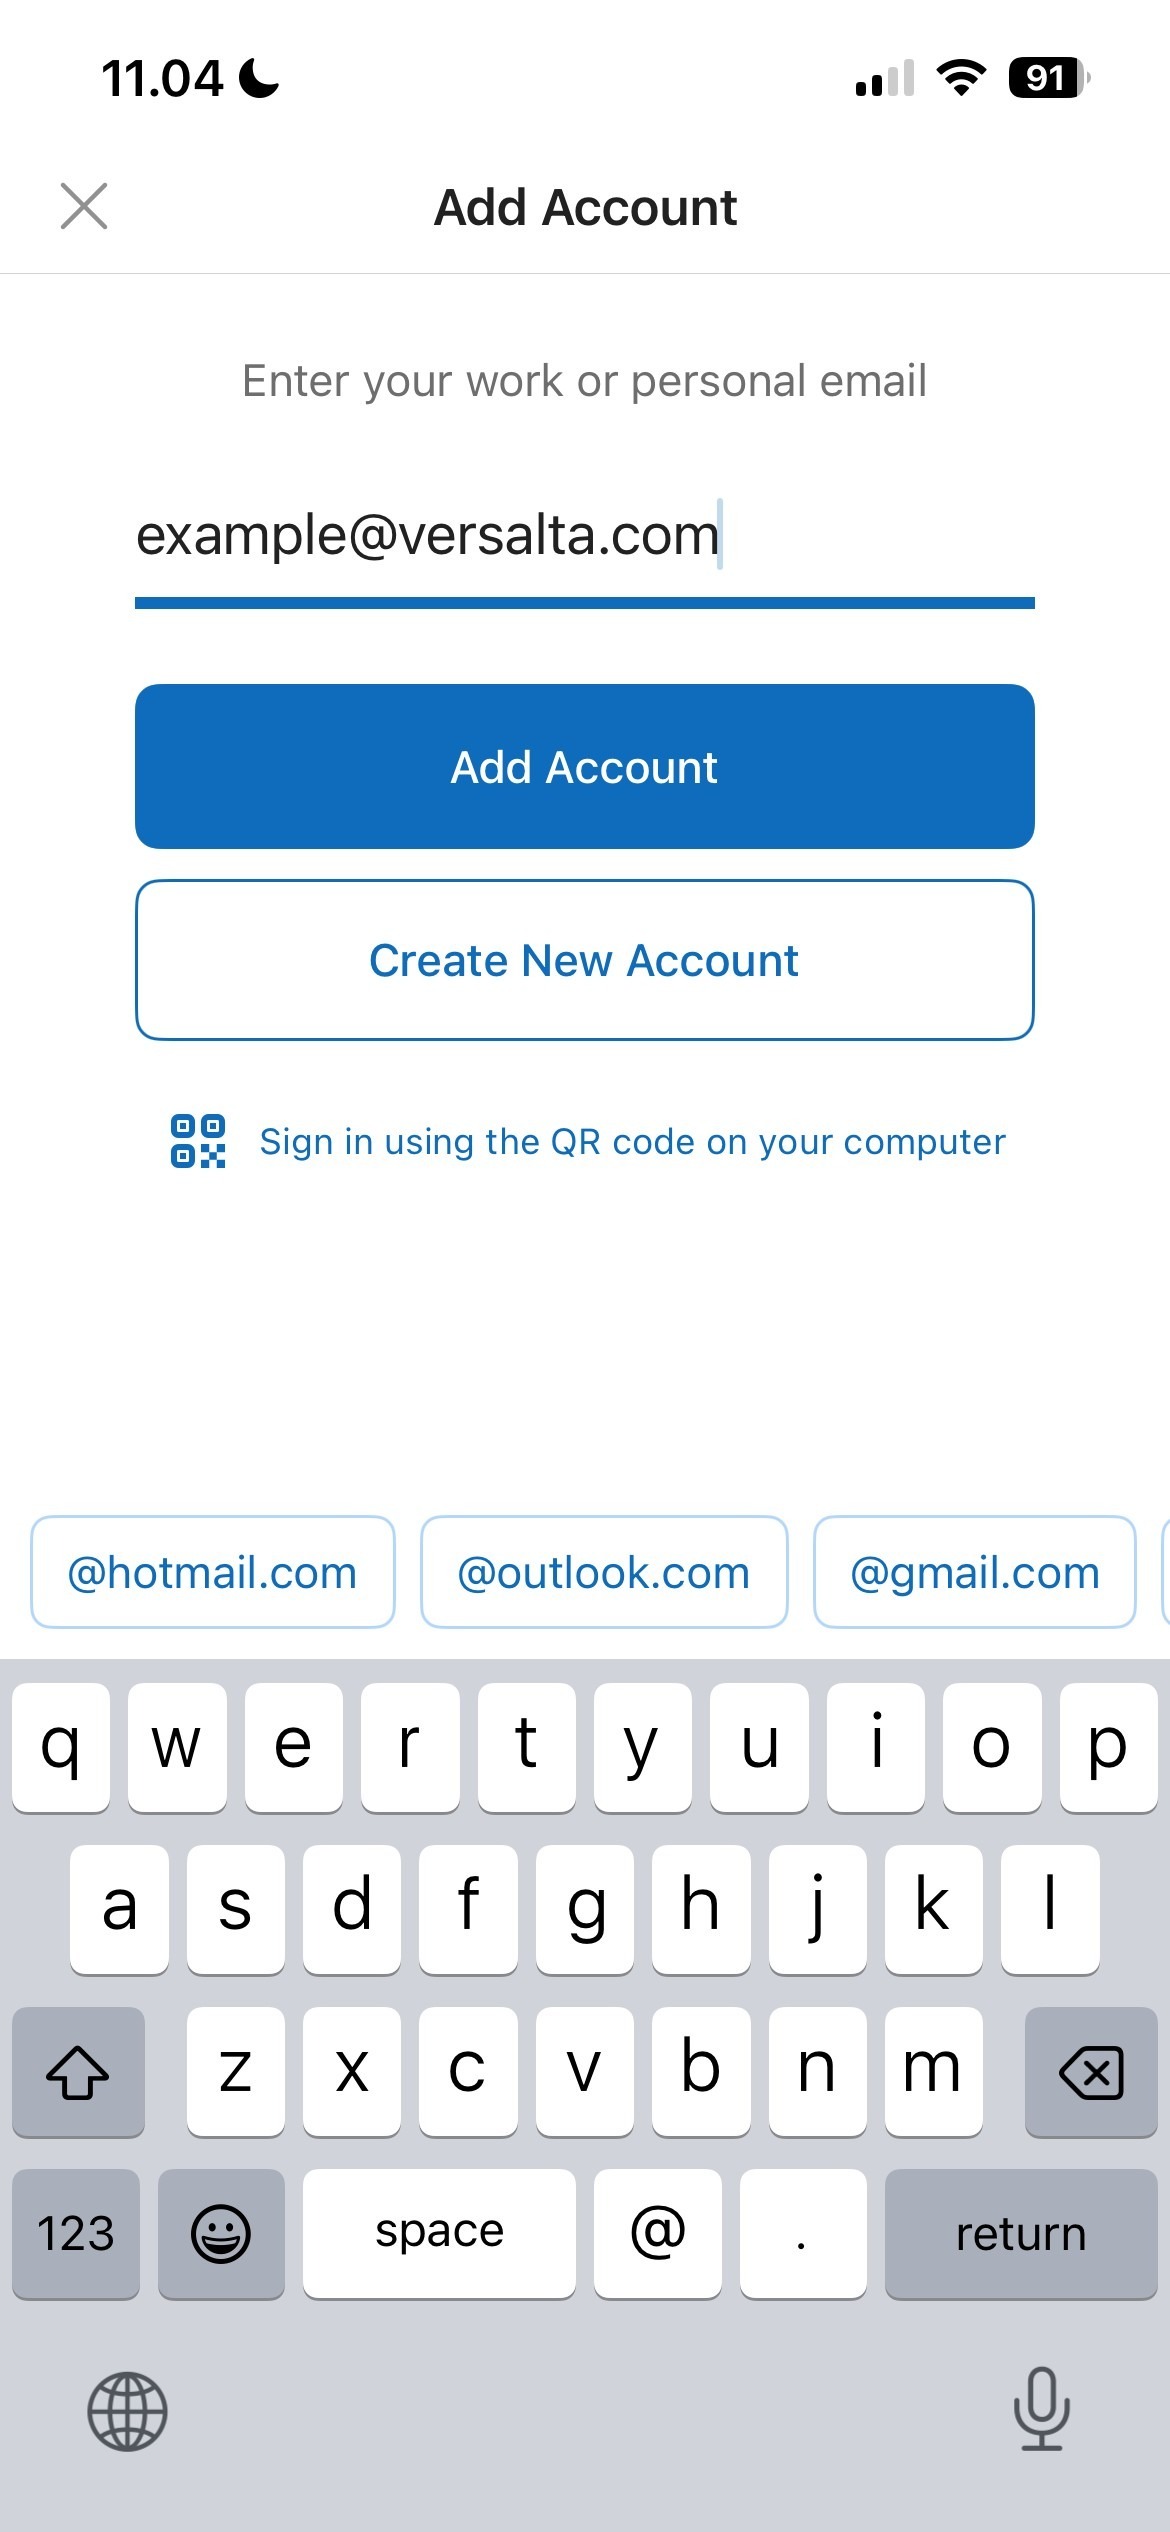
You will be required to change this password after the first log in. You may then be prompted to set up Microsoft multi-factor authentication, in which case you can find assistance here: How do I Set Up M365 Multi-Factor Authentication?
Was this article helpful?
That’s Great!
Thank you for your feedback
Sorry! We couldn't be helpful
Thank you for your feedback
Feedback sent
We appreciate your effort and will try to fix the article